Building a progressive web application
I recently finished developing a progressive web application for a local taxi company owned by a friend.
The story begins like this: one day, while my friend was driving me home, he handed me his phone and asked me to enter several rows into an Excel spreadsheet. The rows represented orders that he had received from customers over the phone. After that, he had to call the drivers working for him to inform them about the new orders. Furthermore, those drivers had to either memorize this information, or jot it down in a notebook. This created a lot of cognitive load and sometimes led to customers being forgotten. I was struck by how inefficient this process was and began wondering whether I could develop a tailored solution to streamline their operations. After all, what better way to spend a weekend than by engaging with new technologies?
In this article, I will share how it turned out, what challenges I faced, how I solved them, and what I learned along the way.
Overview
The result
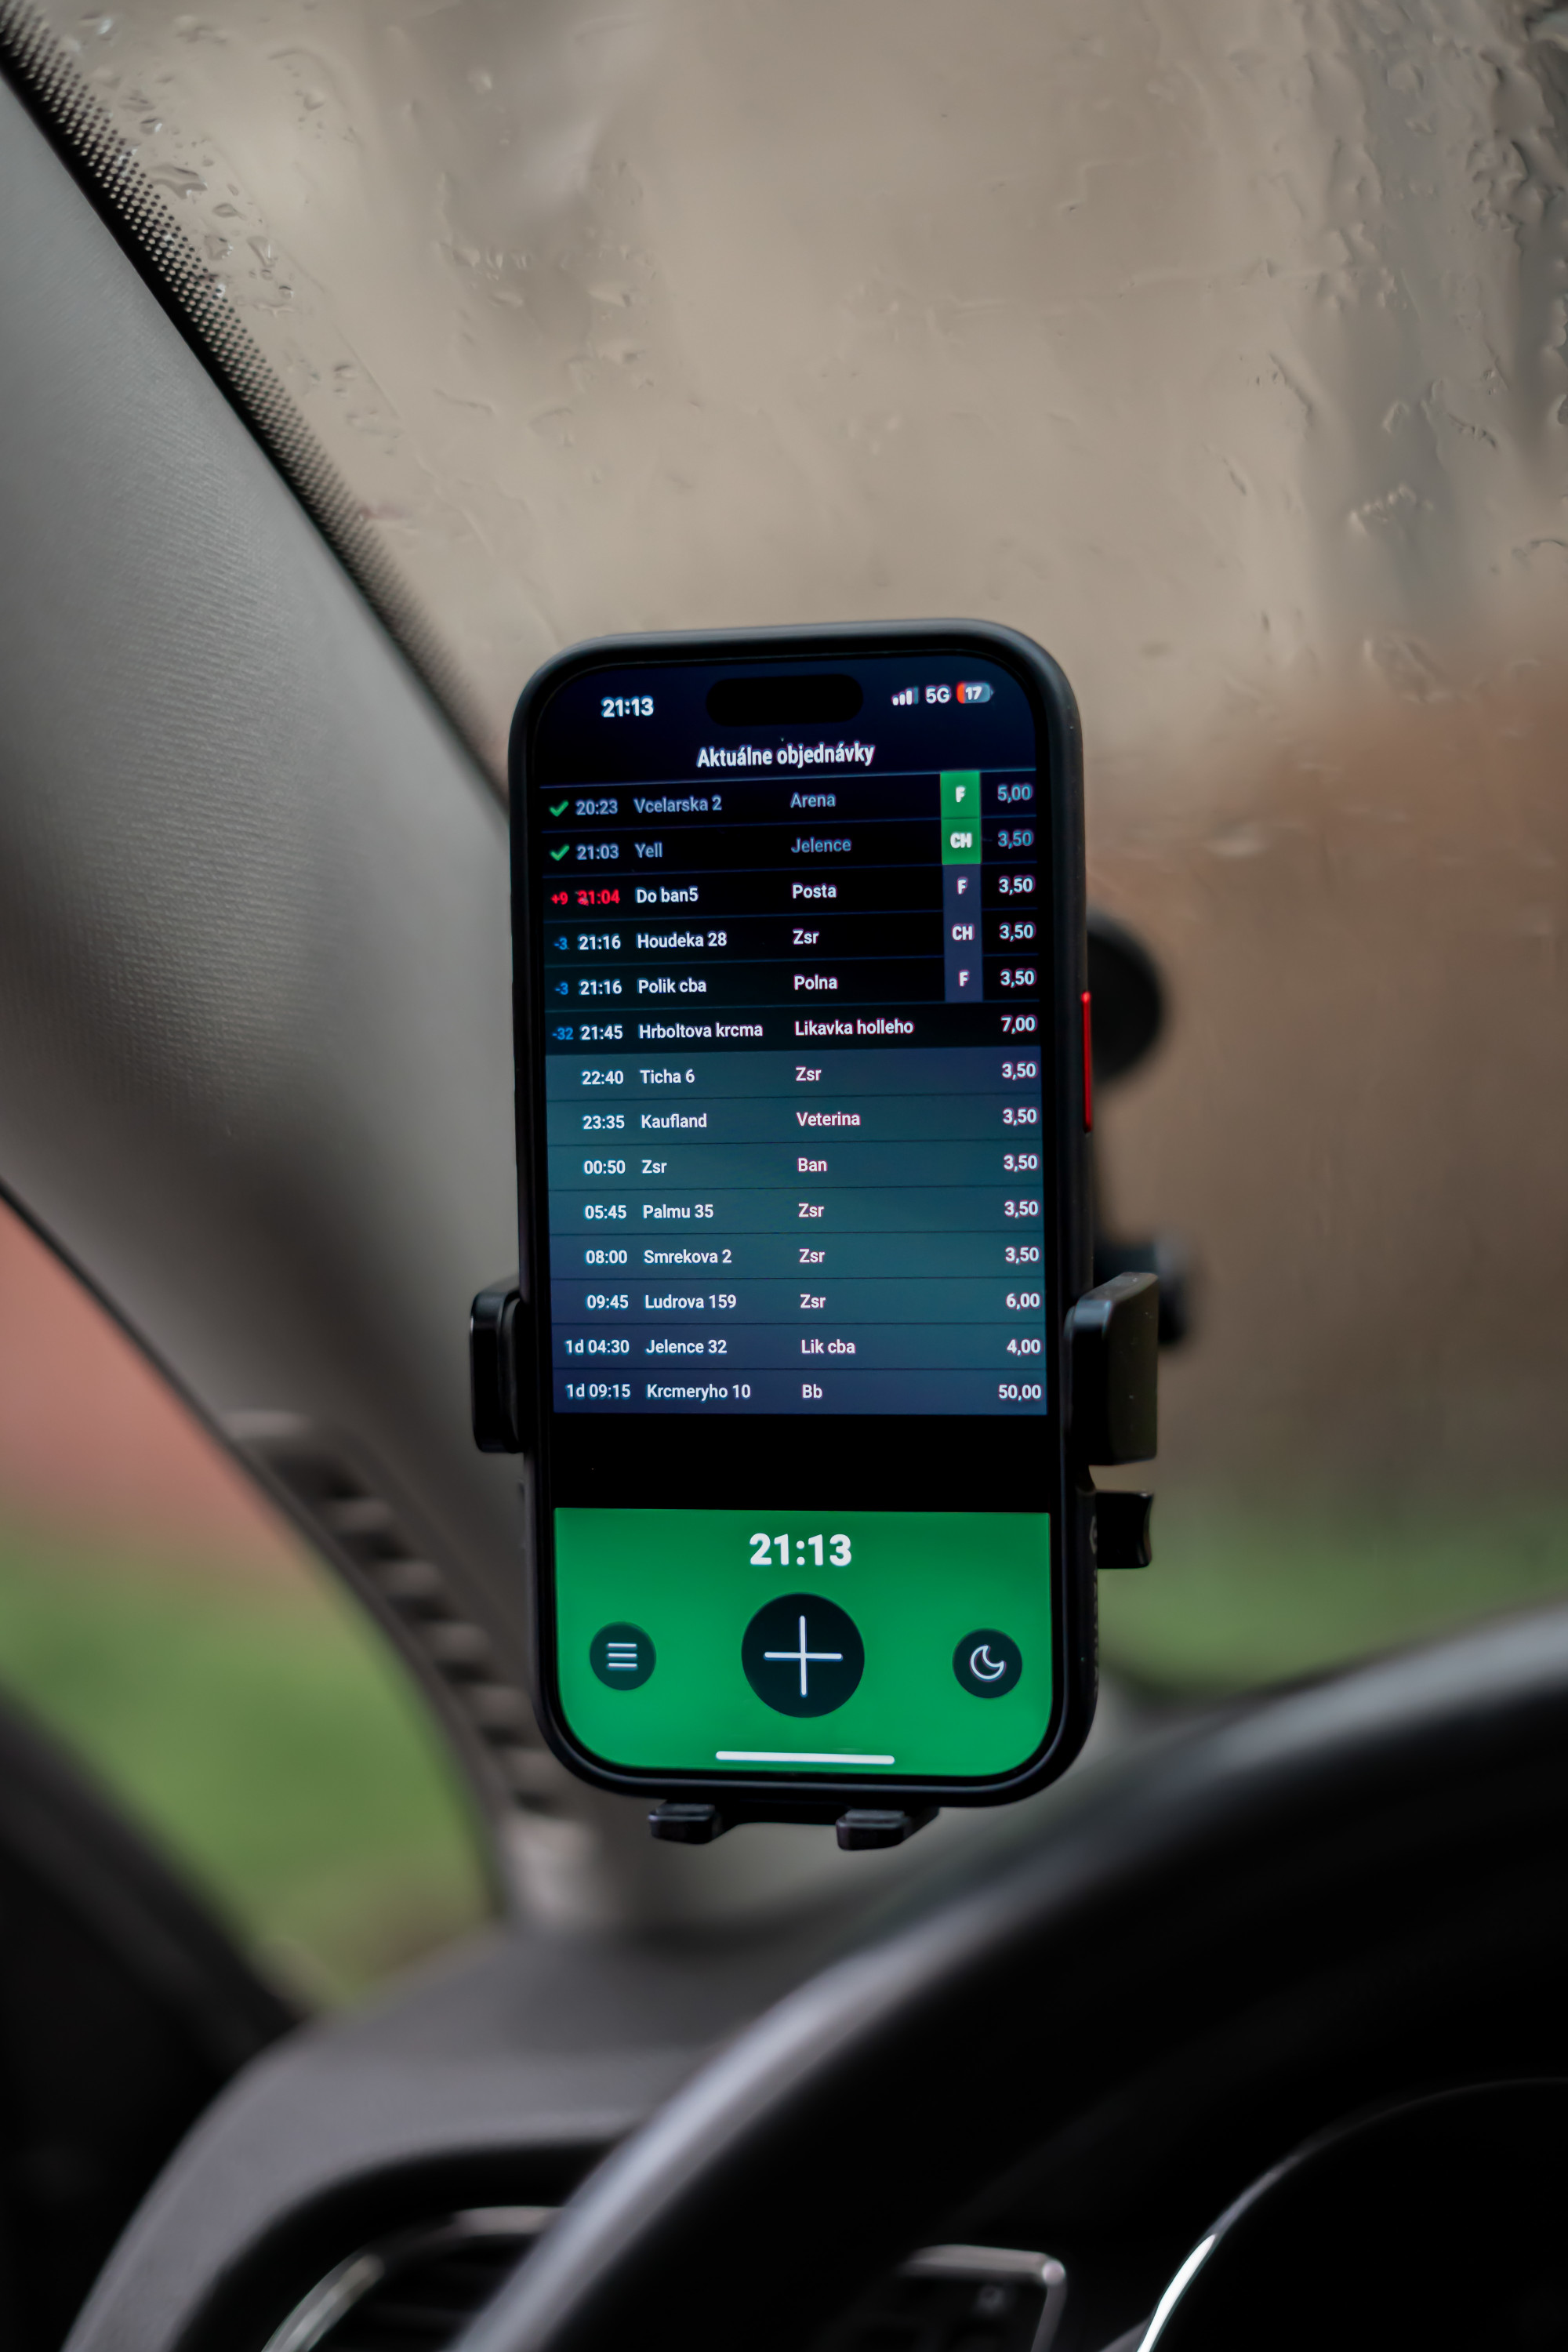
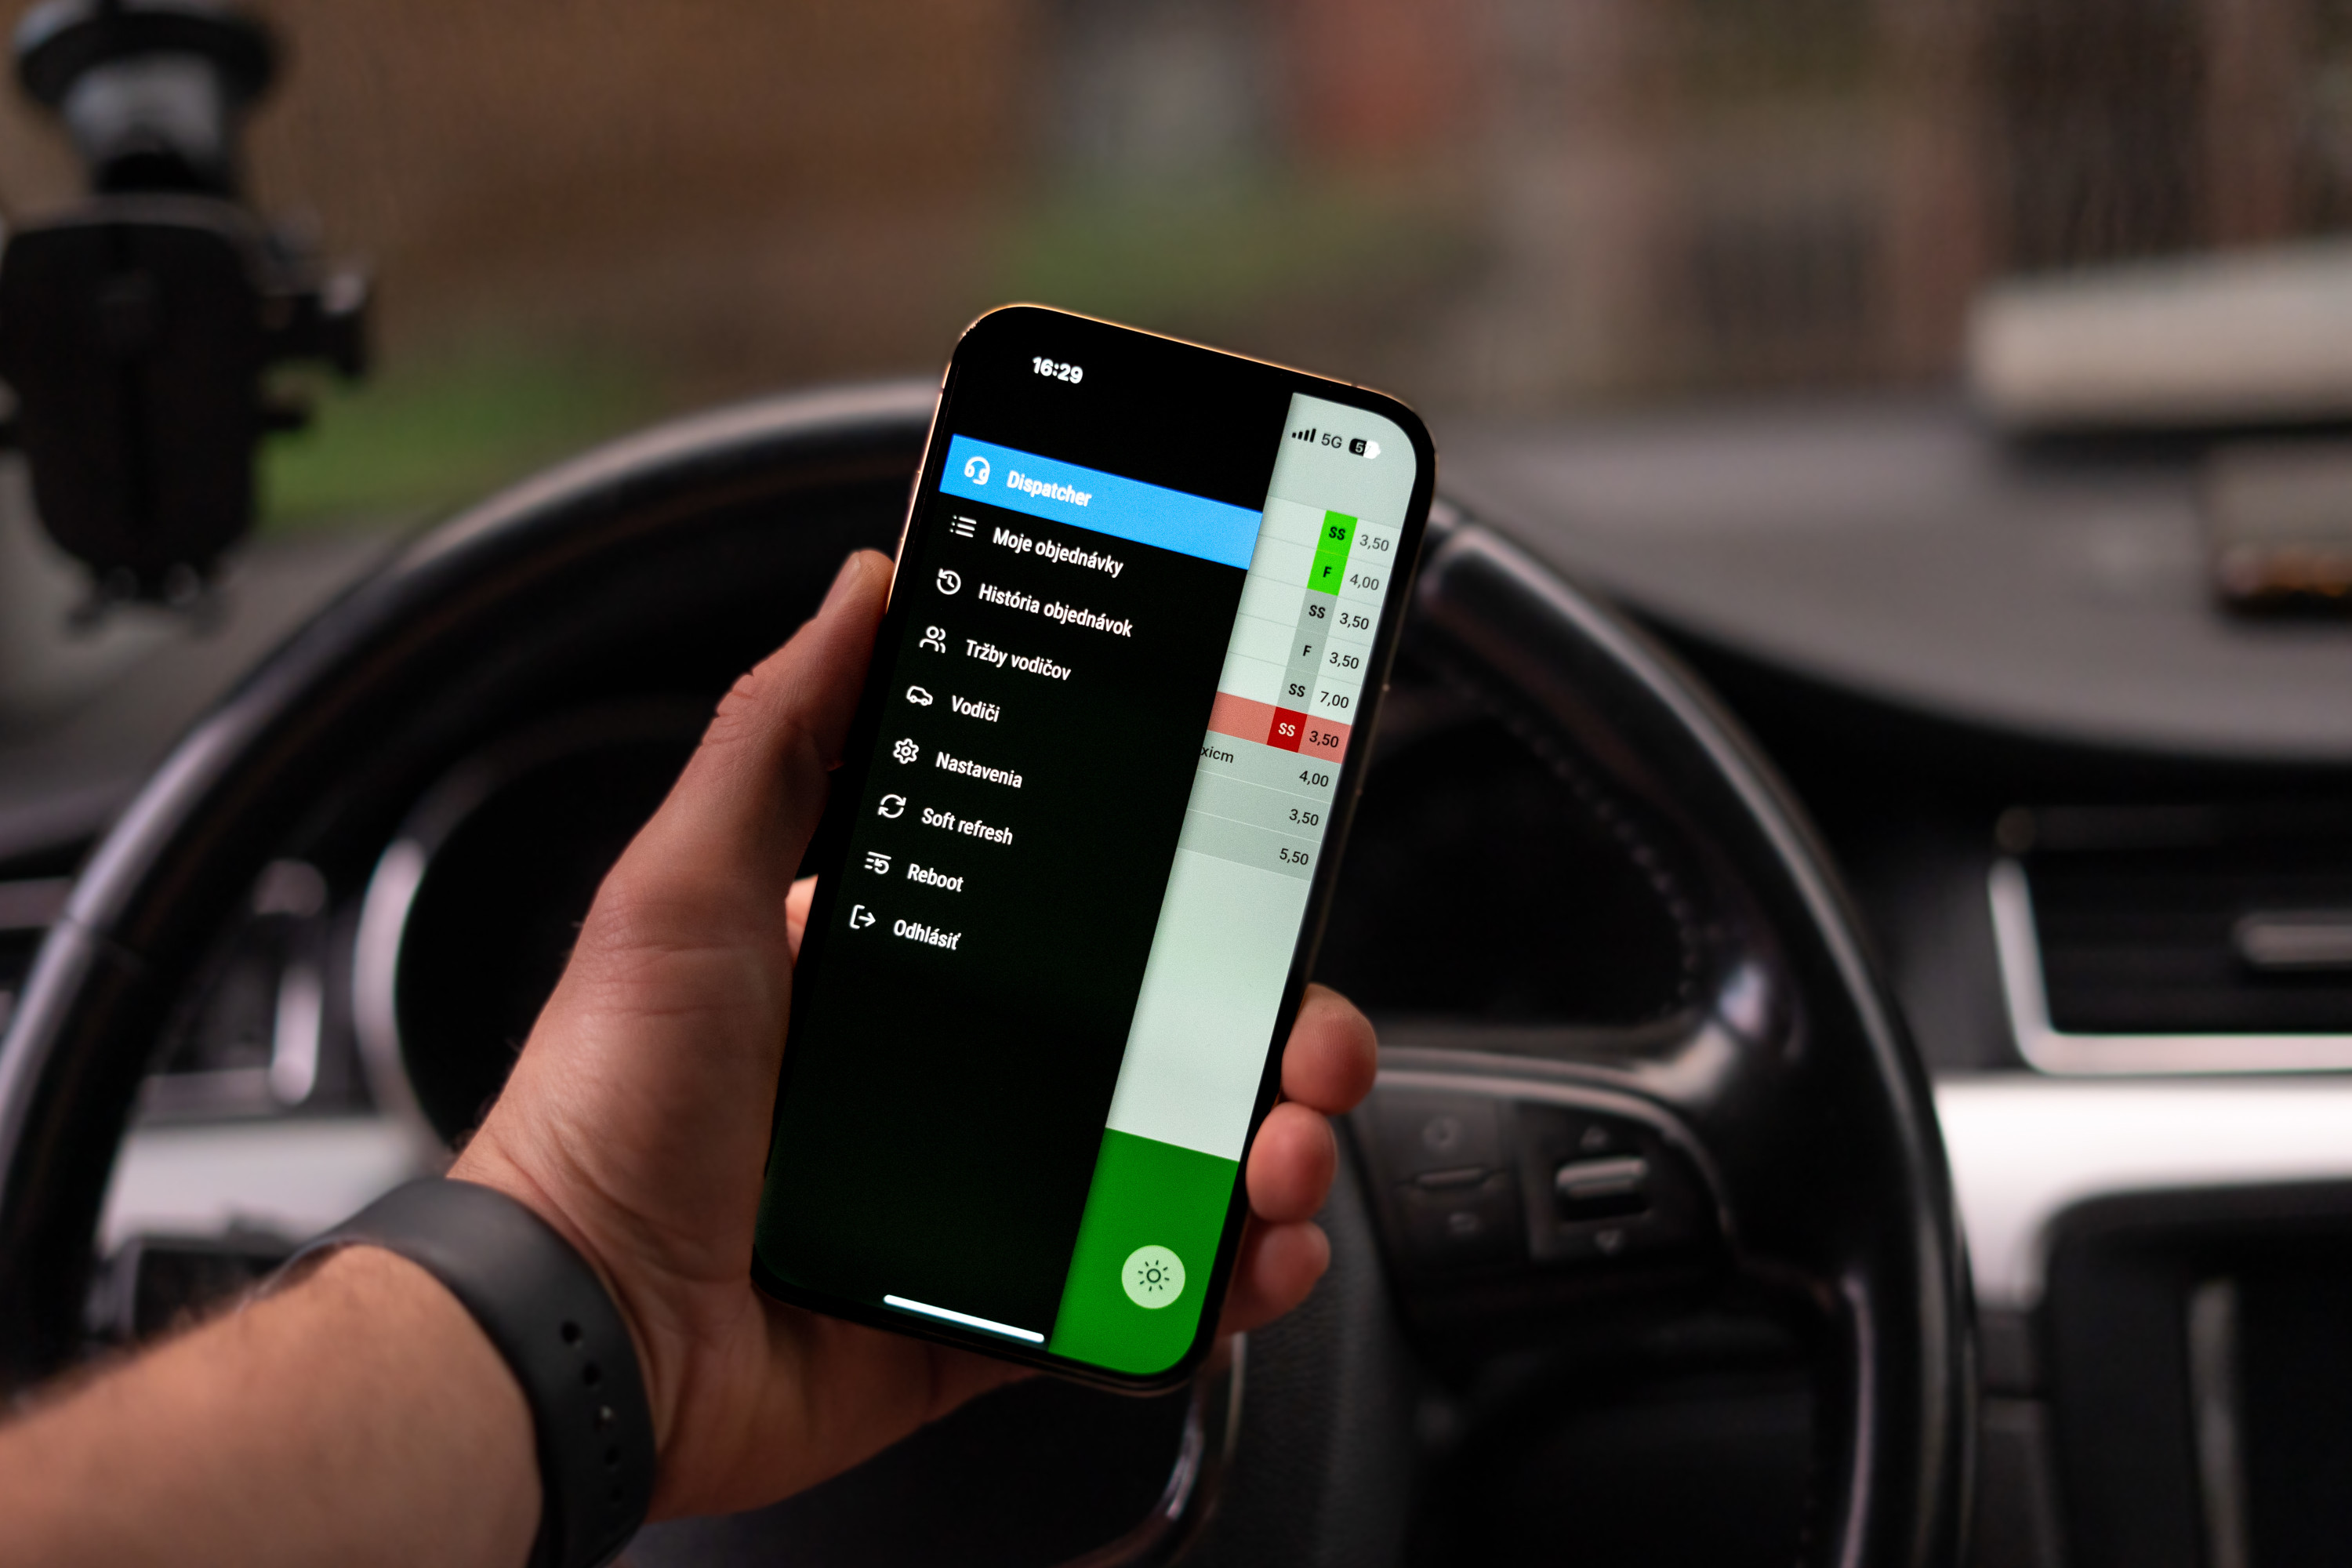
First, a few photos of the app being in use. Luckily my friend is also a photographer, so he took some great photos for me during real-world use. The light and dark themes follow.
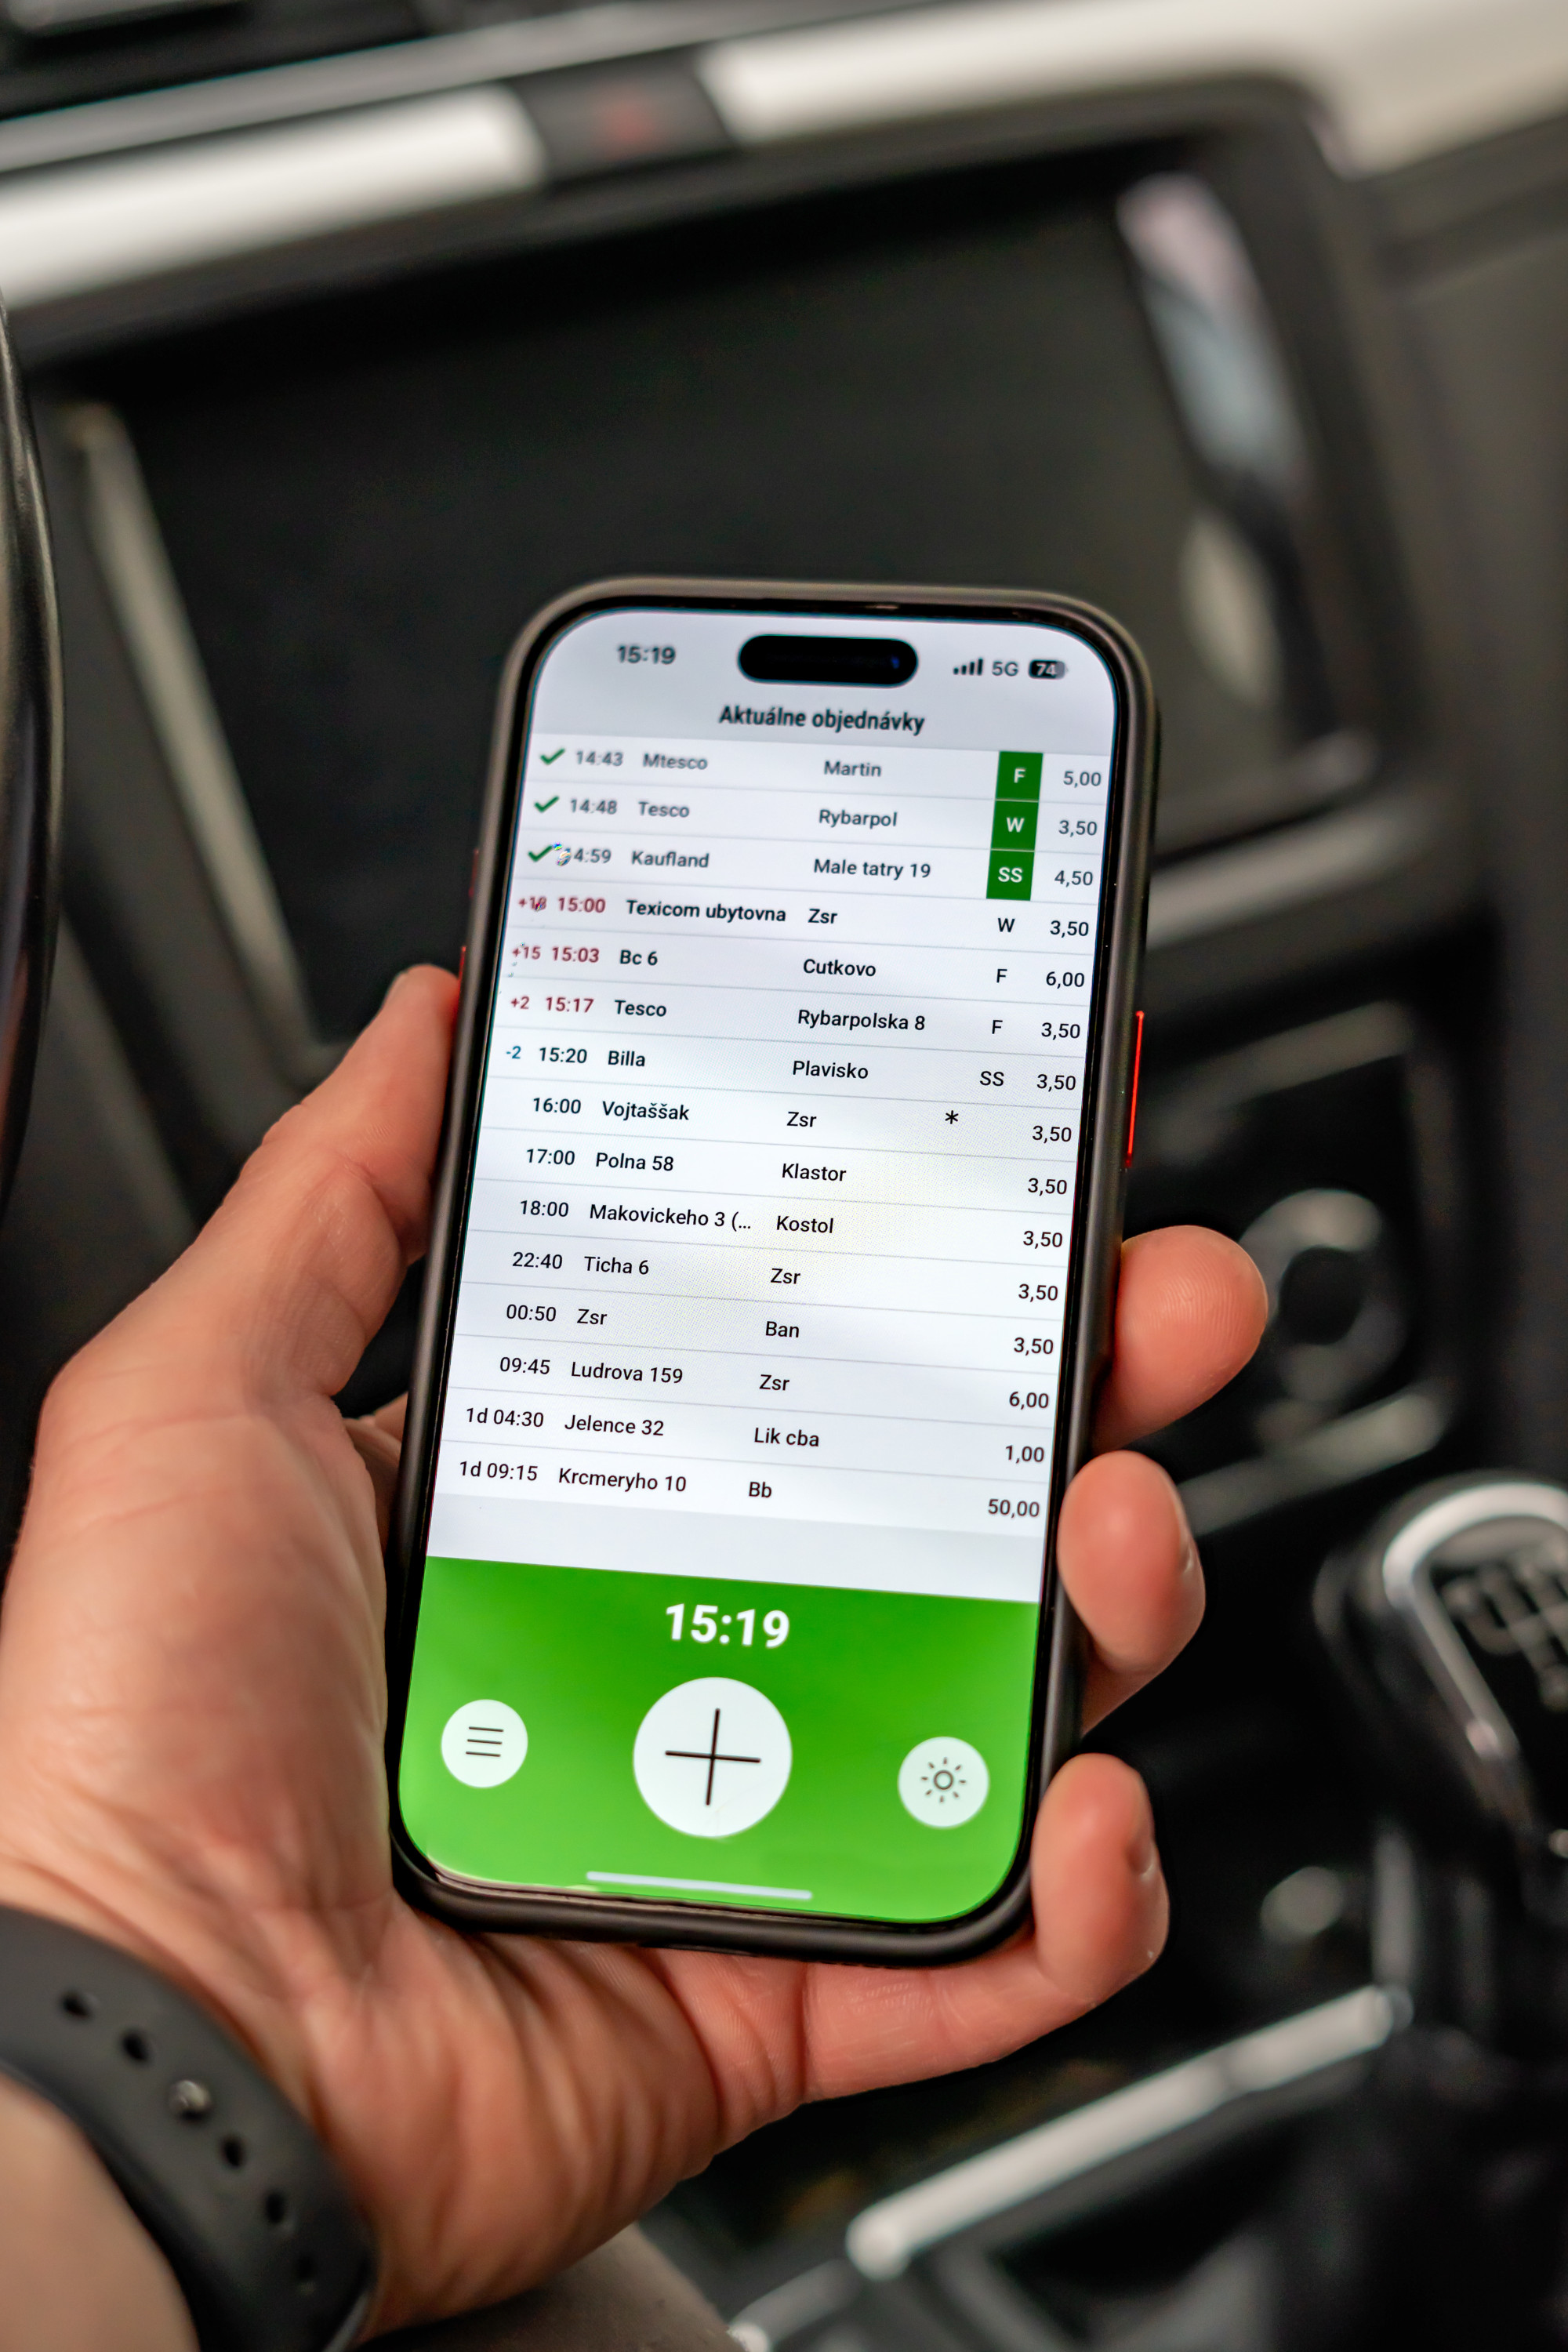

In summary, the app feels native on both iOS and Android, works fully offline (for example, users can create new orders or edit existing ones while being offline), synchronizes quickly with other instances when online, or right after coming online (typically within 500 milliseconds), supports native push notifications using web standards (the notifications work even on Apple Watches, so some drivers sometimes do not have to use their phones at all), can be updated on client devices easily within a few seconds with a relatively safe release process as far as I have experienced and is blazing fast (as a long-time user of TUIs, I just love fast UIs).
The method
In line with the agile manifesto, I chose to build a proof of concept quickly and, if it proved functional and usable, to continue improving it iteratively; fixing issues we found and refactoring the code as needed. To avoid falling into the abyss of unmaintainable code, I decided to follow the recommendations of static analysis tools from the very first line of code, adhere to all SOLID principles, design the system in hexagonal architecture and by all means, avoid over-engineering for future requirements. I also made use of GitHub’s Copilot to go faster.
The app was deployed for production testing after 50 hours of work (roughly five days). Then we had a month-long period of adding features, fixing bugs and refactoring the code.
Over the past two months, no new features have been added and no bugs discovered. The system now works maintenance-free and the taxi company can no longer imagine reverting to their previous way of working. They now make 50% to 70% fewer phone calls to each other every month. Drivers report being happier at work and finding their daily driving easier and more enjoyable.
The tech stack
- Frontend: TypeScript
- Backend API: PHP (The sole reason I chose PHP was that I could build the backend fastest in it, allowing us to begin production testing as soon as possible. If I were to continue refactoring and improving the system, I would rework the backend in Node.js; or in Rust, if I were aiming for maximum performance.)
- Websocket server: TypeScript running in Node.js
- Push server: TypeScript running in Node.js
- Production: DigitalOcean
We could consider the service worker as a separate piece of the stack, as it has its own build process, however, I will consider it a part of the frontend itself, although it will receive its own, separate section.
Code quality
- Jest for unit testing TypeScript
- Puppeteer for e2e flow testing
- PHPUnit for unit testing PHP
- Eslint 9 for static analysis of TypeScript code
- PHPStan 2 for static analysis of PHP code
Let us now go through all the pieces of the puzzle one by one and see how it all works together.
The frontend
The frontend was built offline-first, meaning that when the app is first loaded in the browser, its service worker caches all assets for later offline use. Also, an “install this app” option is presented on mobile devices and on desktop browsers, which when used, installs the app to the home screen and prepares it for offline use.
Subsequently, the app can be opened and used fully offline without an internet connection. The user can use the app in its entirety, i.e. can create new drivers, can create new orders, assign orders to drivers, etc.
If the user has a valid authentication token and is online, their data is instantly being synced to the backend and pushed to other devices authenticated to the same company, but this is not a strict requirement.
The frontend code
To illustrate how this works, let’s look at some code. The frontend
code of the app is located in src/. The following is src/index.html,
the entry point to the app:
<!doctype html>
<html lang="en">
  <head>
    <link rel="manifest" href="manifest.json" />
    <title>Taxi</title>
    <script type="module" src="main.ts"></script>
    <link rel="stylesheet" href="../sass/main.scss" />
  </head>
  <body style="opacity: 0"></body>
</html>
The build process is started with:
parcel build src/index.html \
    --dist-dir dist \
    --public-url /
Parcel then traverses all the files included in index.html
and bundles them into the dist/ directory. One of those files, as you can see,
is src/main.ts, which is the TypeScript entry point to the app and this is
how it looks in its entirety:
import {
    ServiceContainer
} from '@Taxi/Shared/Infrastructure/ServiceContainer'

const serviceContainer = new ServiceContainer()

serviceContainer.getRouter().handle(
    window.location.pathname
)

serviceContainer.getApp().fadeIn()

serviceContainer
  .getSyncService()
  .start()
  .catch((error: unknown) => {
    console.error(error)
    console.error('SyncService failed to start')
  })

serviceContainer
  .getServiceWorkerFactory()
  .registerServiceWorker()
  .catch((error: unknown) => {
    console.error(error)
    console.error('Error registering service worker')
  })
The routes in the router look like this:
router.addRoute('/orders/history', ordersHistoryController)
router.addRoute('/active-orders', activeOrdersController)
router.addRoute('/orders/new', newOrderController)
router.addRoute('/order/{1}', orderDetailController)
router.addRoute('/order/{1}/edit', editOrderController)
router.addRoute('/drivers', driversController)
router.addRoute('/driver/{1}', driverDetailController)
router.addRoute('/drivers/new', newDriverController)
router.addRoute('/settings', settingsController)
Controllers implement the ControllerInterface:
export interface ControllerInterface {
  handle(): void
}
When a handle() of a controller is called, it builds the entire HTML that
needs to be presented on the screen and inserts it into the DOM.
IndexedDB is used to store all local data for offline use. This is done through a DatabaseInterface and relevant services.
(One interesting thing that caught me off guard is that IndexedDB does not index
null values and thus does not let you query for values that are null.)
Let us look at an example: an order being marked as finished.
OrderDetailController renders a button which can be clicked:
finishOrderButton.addEventListener(
  'click',
  () => {
    this.orderService.finishOrder(orderId)
  },
)
In our OrderService:
export class OrderService {
  constructor(
    private orderRepository: OrderRepositoryInterface,
  ) {}

  public async finishOrder(orderId: OrderId) {
    const order = await this.orderRepository.getById(
      orderId
    )

    order.finish()

    await this.orderRepository.persist(order)

    order.releaseEvents().forEach((event) => {
      this.eventBus.dispatchEvent(event)
    })
  }
}
This is the finish() part of the Order entity:
public finish() {
  this.assertNotCancelled()
  this.assertNotFinished()

  this.finished = true
  this.lastUpdate = new Date()
  this.requiresSync = true

  this.recordEvent(
    new OrderWasEdited(this.orderId)
  )
}
And at last, persist() is called on the OrderRepositoryInterface:
import { Order } from '@Taxi/Orders/Domain/Order'
import { OrderId } from '@Taxi/Orders/Domain/OrderId'

export interface OrderRepositoryInterface {
  getById(orderId: OrderId): Promise<Order>
  persist(order: Order): Promise<void>
}
The implementation of persist():
export class OrderRepository implements OrderRepositoryInterface
{
  private readonly orders = 'orders'

  constructor(
    private database: DatabaseInterface,
  ) {}

  persist(order: Order): Promise<void> {
    return this.database.save(
      this.orders, order.toDatabase()
    )
  }
}
SyncService listens to the OrderWasEdited event and when caught,
it triggers a sync:
;[
  NewOrderWasCreated,
  NewDriverWasCreated,
  OrderWasCancelled,
  OrderWasEdited,
  OrderWasAccepted,
  DriverWasActivated,
  DriverWasDeactivated,
  DriverWasDeleted,
].forEach((eventClass) => {
  this.eventBus.addEventListener(eventClass, () => {
    void this.pushData()
  })
})
This could be refactored so this list does not grow indefinitely, however, I was hesitant to extend these events from a common base class, as that can easily break SOLID. An interface would be a clean solution, however, in TypeScript there are no interfaces at runtime.
To avoid pushing and pulling data at the same time, SyncService leverages
a promise queue, such as this:
export class SyncService {
  private syncQueue: Promise<void> = Promise.resolve()

  private async pushData(): Promise<void> {
    this.syncQueue = this.syncQueue
      .then(() => this.executePush())
      .catch((error: unknown) => {
        setTimeout(() => {
          void this.pushData()
        }, this.retryDelay)
      })

    return this.syncQueue
  }

  private async pullData(): Promise<void> {
    this.syncQueue = this.syncQueue
      .then(() => this.executePull())
      .catch((error: unknown) => {
        setTimeout(() => {
          void this.pullData()
        }, this.retryDelay)
      })

    return this.syncQueue
  }
}
This assures that if whatever event triggers a push or a pull, it will actually trigger only after the whole queue has finished (or immediately, if it’s empty). Thus, a pull and a push operation cannot run at the same time in parallel.
The actual push, when it gets on the queue, looks like this:
private async executePush(): Promise<void> {
  const orders = await this.database.getAll(
    'orders', {
      indexName: 'requiresSync',
      value: 1,
    }
  })

  if (orders.length > 0) {
    await this.pushOrders(orders)
  }

  if (loggedInUser.isDriver()) {
    return
  }

  const drivers = await this.database.getAll(
    'drivers', {
      indexName: 'requiresSync',
      value: 1,
    }
  })

  if (drivers.length > 0) {
    await this.pushDrivers(drivers)
  }
}
Since we’re dealing with a chained promise queue, pushOrders can be implemented
in any way, as long as it throws an exception when a problem occurs and it will be
automatically retried later.
When an order is successfully pushed to the server, the lastUpdate time
is set to the current time of the server and the order is sent back
to the client in the response of the push request. The client replaces
their local order with this data.
Additionally, when a successful pull is made by a client, the current time of the server is included in the response and saved on the client side as the time of the last successful pull. This timestamp is included in every pull request. This means that no change is ever missed.
Two sources of truth for time
Initially, I made it a rule that if someone pushed data with a lastUpdate timestamp
older than what the server already held, the push would be rejected. I assumed this
would guard against those rare edge cases in which an offline device modifies an entry
that has, in the meantime, been altered by another online device.
It didn’t take long before the warning log began growing faster than I had anticipated – those cases turned out to be more common than expected.
After adding debugging information to the logs and investigating further,
I discovered the source of the problem: the clocks on client devices,
which could be off by tens of seconds. What was happening was this:
a client would push an Order to the backend, which would update its timestamp
to the backend’s current time and return the modified data to the client.
While the client did replace its local copy with the server’s version,
it was still possible for the client to make further edits and push the order again.
However, because the client’s clock lagged more than 10 seconds behind the server’s,
the backend considered its own version “newer” and rejected the update.
So I changed the rule: reject older data from a client only if the current data was pushed by a different client. Otherwise, allow the same client to submit new values with any timestamp. After this change, the problem was resolved, and the warning log ceased growing.
WebSocket
Pushing the data to other clients
Next, we need to tell other client devices to pull the new changes.
For that we have a WebSocket server and leverage Redis’ Pub/Sub to communicate
with the backend API. When a new order is pushed to the backend,
a message is published to Redis, which when received by the WebSocket server,
is forwarded to all clients connected to it, telling them that they should perform a pull.
A good thing about this approach is that it spawns another thread and is non-blocking
to the original process, meaning the push request can send a HTTP 200 response
immediately and no one has to wait for anything. Also, no one ever has to poll.
All thanks to WebSocket.
All the backend has to do is this:
<?php

final class PushDataController implements RequestHandlerInterface
{
    public function __construct(
        private RedisClientInterface $redisClient,
    ) {}

    public function handle(
        ServerRequestInterface $request,
    ): ResponseInterface
    {
        /**
        * Updates are performed;
        * not visible in this snippet.
        */

        if ($updatesPerformed > 0) {
            $this->redisClient->publish(
                'websocket',
                'remote-data-changed',
            );
        }
    }
}
The WebSocket server listens to redis messages and forwards them to clients:
redis.on('message', (channel, message) => {
  if (channel === 'websocket') {
    authenticatedClients.forEach((client) => {
      client.send(message)
    })
  }
})
The WebSocket client listens to these messages:
export class WebSocketClient {
  private socket: WebSocket

  constructor(
    private eventBus: EventBusInterface,
  ) {
    void this.connect()
  }

  private async connect() {
    this.socket = new WebSocket(
      this.getWebsocketUrl()
    )

    this.socket.onmessage = (event) => {
      if (event.data === 'remote-data-changed') {
        this.eventBus.dispatchEvent(
          new RemoteDataWasChanged()
        )
      }
    }
  }
}
And finally, in the SyncService:
this.eventBus.addEventListener(
  RemoteDataWasChanged, () => {
    void this.pullData()
  }
)
This means that now we have a two-way backend-to-client communication that is instant and requires no polling. WebSockets are nice.
I was amazed by how fast this was from the start. It typically takes less than 500 milliseconds for new orders to appear on other client devices after being created on one device.
The websocket server execution is managed by systemd:
[Unit]
Description=WebSocket for Taxi
After=network.target mariadb.service redis-server.service
Requires=mariadb.service redis-server.service
BindsTo=mariadb.service redis-server.service

[Service]
Type=simple
User=www-data
Environment=NODE_ENV=production
WorkingDirectory=/var/www/websocket/
ExecStart=node /var/www/websocket/dist/server.js
RestartSec=3
Restart=always

[Install]
WantedBy=multi-user.target
To improve things further, the sync is performed whenever the WebSocket is (re)connected, as pull requests could have been missed if the websocket was disconnected for whatever reason:
this.eventBus.addEventListener(
  WebSocketWasConnected, () => {
    void (async () => {
      await this.pushData()
      await this.pullData()
    })()
  }
)
If the WebSocket server is unavailable, the app falls back to slow polling and performs a pull every 60 seconds.
One more WebSocket lesson
WebSocket server implementations do not usually implement HTTPS handling themselves. This is normally handled by the webserver. So I leveraged apache2 for that.
The websocket server itself runs on a local port 50000 and is then proxied by the webserver with a https certificate to the open web:
<VirtualHost *:443>
   ProxyRequests Off
   ProxyPass "/websocket" "ws://localhost:50000/"
   ProxyPassReverse "/websocket" "ws://localhost:50000/"
</VirtualHost>
Service Worker: The final piece of the offline puzzle
Understanding how service workers work was the hardest part of the whole project.
Service workers handle proxying fetch requests when the network is offline and also make push notifications possible, as they are constantly active, even when the app is not on the screen (or even when the screen is off and locked).
First, it took me some time to figure out that
they must have their own tsconfig.json, as the context they run
in is different from the DOM context:
{
  "files": ["./service-worker.ts"],
  "compilerOptions": {
    "lib": ["ESNext", "WebWorker"],
  }
}
Then I had to learn how to cache assets inside the service worker. Luckily, Parcel made it a bit easier, as it generates a manifest file with all used assets, which can then be provided to the service worker when building the project, such as this:
declare const self: ServiceWorkerGlobalScope

import { manifest, version } from '@parcel/service-worker'

self.addEventListener('install', (event) => {
  self.skipWaiting()

  event.waitUntil(
    (async () => {
      const cache = await caches.open(version)
      for (const url of manifest) {
        await cache.add(url)
      }
    })(),
  )
})
This is what creates the offline experience. When the connection is down, the service worker returns the cached assets, without the client being aware of the downed connection at all.
This creates a whole new set of problems, however: pushing new updates to the clients. When an application is supposed to be fully offline, how do we tell the clients that now they have to actually fetch new assets?
Updating the app on the client side
After a lot of struggle, I ended up with the following setup:
I can release updates in 4 “levels”:
-
L1: an update which requires no reload on the client side (this includes non-breaking updates to the backend, for example)
-
L2: an update which requires a reload on the client side during the next navigation attempt (this includes updates that do not change the local database schema and perform small UI fixes/improvements which are not needed to be shown “right away”)
-
L3: an update which requires a reload on the client side as soon as possible (this includes updates that do not change the local database schema and perform changes on the client which I want to be loaded as soon as possible)
-
L4: an update which requires a “reboot” on the client side, which also performs a full local database rebuild (these are now rare)
Release script
Releases are performed using a bash script which builds the assets
and then runs the tests. If everything is fine, it creates a release file.
During the build process, it asks interactively whether the client version
should be incremented; this means that a reload is required
on the client side as soon as possible; otherwise no reload shall be performed.
If the database version is incremented, a reboot is performed on the client side, recreating the whole local database.
After a release is made, it is pushed to production.
The push to production looks like this (all automated by the script):
- The release is
rsynced to a new, temporary location on the remote server MAINTENANCE=trueis set in the.envfile. When this is set to true, the backend will respond withHTTP 503to every request. This means that if any clients are trying to push or pull data during the update, their requests will fail and their apps will keep retrying (including a visual indicator that a sync is pending). Keep in mind that the app is still fully usable at this point, the only disabled feature is the sync.- The release is moved on the remote from the temporary location to the production path
MAINTENANCEis removed from the.envfile and the backend starts serving requests again.- The websocket server is optionally restarted, depending on what update level I am aiming for.
The 5-step push described above occurs in less than 5 seconds, thanks to the power
of rsync; the backend downtime is roughly half that time.
Client apps also have an online indicator. The green bottom bar that you see on the photos turns red when the network is offline (websocket disconnected).
Orders that are unpushed and require sync are indicated in the table with a specific, animated, “loading” background. Users usually do not see this, as sync is most of the time instant.
If the WebSocket server is restarted, then all clients’ websocket connections are reconnected. This triggers the following flow on the client side:
A pull is started:
this.eventBus.addEventListener(
  WebSocketWasConnected, () => {
    void (async () => {
      await this.pushData()
      await this.pullData()
    })()
  }
)
In the pull response, the current client version is included. If the version running on the client device is older, the service worker is asked to update:
if (json.serverVersion !== clientVersion) {
  this.updateServiceWorker()
}

private updateServiceWorker(): void {
  this.serviceWorkerFactory
    .updateServiceWorker()
    .then(() => {
      console.log('Requested service worker to update')
    })
    .catch(() => {
      console.error('Service worker update failed.')
    })
}
One of the advantages of updating a service worker is that the new worker is
spawned in the background, while the old one continues to serve the app.
This allows the user to keep using the application uninterrupted.
Furthermore, if any of the fetch() requests during the install phase of the
new service worker fail (unless exceptions are explicitly caught),
the installation itself fails. In such cases, the update is retried later.
Crucially, the app does not enter a broken state, since the old service worker
remains active and continues to function normally.
If the service worker update succeeds, the new service worker is ready to be started. For that to happen, however, the current app window must be reloaded, as the old service worker must first be stopped.
We do that by sending a message from the service worker to all open windows:
self.addEventListener('activate', (event) => {
  event.waitUntil(
    (async () => {
      const clients = await self.clients.matchAll({
        type: 'window',
        includeUncontrolled: true,
      })

      for (const client of clients) {
        client.postMessage({
          type: 'service_worker_updated'
        })
      }
    })(),
  )
})
When the main app window registers this event, it reloads the page:
navigator.serviceWorker.addEventListener(
  'message',
  (event) => {
    if (event.data.type === 'service_worker_updated') {
      window.location.reload()
    }
  }
)
Rebuilding the local database
There is a way to execute local database migrations, as the IndexedDB
fires an upgradeneeded event and this event holds the old and the new version
number. However, making these migrations stable (and not time-consuming to develop)
turned out to be difficult, so I chose a different approach to handle this case.
Whenever I need to execute a full recreate on the client side, I increase the local database version:
export class LocalDatabase implements DatabaseInterface {
-- private databaseVersion = 28
++ private databaseVersion = 29
This triggers the following code:
request.onupgradeneeded = (event) => {
  if (event.oldVersion > 0) {
    window.location.href = '/init.html'
    return
  }
}
In our init.html, we have a separate init.ts file, which contains bare minimum
code to destroy the local database, recreate it and pull all data anew.
One interesting problem I had to solve is that sometimes this didn’t work. It is possible for an app window to be blocking the database, keeping it open. For those cases, I wrote a nifty little hack.
A special “unload” message is dispatched before deleting the local database:
async function deleteDatabase(
  name: string,
): Promise<void> {
  const channel = new BroadcastChannel(
    'unload-coordinator'
  )
  channel.postMessage({ type: 'unload' })

  await new Promise(
    (resolve) => setTimeout(resolve, 1000)
  )

  return new Promise((resolve, reject) => {
    const request = indexedDB.deleteDatabase(name)

    request.onsuccess = () => {
      resolve()
    }
    request.onerror = () => {
      reject(new Error(
        request.error?.message ?? 'Unknown error')
      )
    }
    request.onblocked = () => {
      reject(new Error('Database deletion blocked'))
    }
  })
}
An UnloadCoordinator listens to this message and if received, redirects the user
to /unload.html, which is a simple, empty page with a button redirecting back
to the root:
export class UnloadCoordinator {
  constructor() {
    const channel = new BroadcastChannel(
      'unload-coordinator'
    )

    channel.onmessage = (event) => {
      const { type } = event.data as unknown as {
        type: string
      }

      if (type === 'unload') {
        window.location.href = '/unload.html'
      }
    }
  }
}
Interestingly, neither I nor the customer have ever seen this screen on production. However, it did solve the database reinitialization problem completely.
Push notifications
In the beginning, I was terrified of push notifications. Surprisingly, they turned out to be the most stable and reliable feature of the app.
Since a few years ago, push notifications can finally be implemented in progressive web apps natively without having to resort to Firebase.
Push notifications are handled by the service worker. When a push notification
permission is granted by the user, we tell the push manager to register
a push subscription. The app requests the public VAPID key of our push server
and includes it with the push registration. The registration itself is done by
the web browser (same for iOS and Android). It usually calls either
https://web.push.apple.com/ or https://fcm.googleapis.com/.
If a new subscription is successfully created, it is sent to our backend and stored in persistence. When we need to send a push notification to this user, this subscription is used.
The whole flow looks like this:
const permission = await Notification.requestPermission()

if (permission === 'granted') {
  try {
    await this.registerSubscription()
  } catch (error) {
    window.alert(error)
    notificationsToggle.disable()
  }
}

private async registerSubscription(): Promise<void> {
  const registration = await navigator.serviceWorker.ready
  const subscription = await registration.pushManager.getSubscription()

  if (subscription) {
    return
  }

  const response = await this.api.get('/push/vapid-key')
  const vapidPublicKey = await response.text()
  const convertedVapidKey = this.urlBase64ToUint8Array(vapidPublicKey)
  const newSubscription = await registration.pushManager.subscribe({
    userVisibleOnly: true,
    applicationServerKey: convertedVapidKey,
  })

  await this.api.post('/push/register', {
    body: JSON.stringify(newSubscription.toJSON()),
  })
}
<?php

final class RegisterPushController implements RequestHandlerInterface
{
    public function handle(
        ServerRequestInterface $request,
    ): ResponseInterface
    {
        /**
        * Authentication is performed;
        * not visible in this snippet.
        */

        $post = $request->getBody()->getContents();
        $decoded = json_decode(
            $post,
            true,
            512,
            JSON_THROW_ON_ERROR,
        );
        $subscription = json_decode(
            $decoded['body'],
            true,
            512,
            JSON_THROW_ON_ERROR,
        );

        if ($this->connection->table('pushSubscriptions')
            ->where('endpoint', $subscription['endpoint'])
            ->exists()
        ) {
            return new JsonResponse([]);
        }

        $newUuid = $this->uuidRepository->getUuid();

        $this->connection->table('pushSubscriptions')
            ->insert([
                'userId' => $loggedInDriver->getDriverId()->toString(),
                'subscriptionId' => $newUuid->toString(),
                'subscription' => json_encode($subscription),
                'endpoint' => $subscription['endpoint'],
            ])
        ;

        return new JsonResponse([]);
    }
}
Our push server looks like this:
redis.on('message', (channel, message) => {
  if (channel === 'push-notification') {
    assert(typeof message === 'string')

    const parsedMessage = JSON.parse(message) as {
      subscription: webPush.PushSubscription
      payload: string
    }

    webPush
      .sendNotification(
        parsedMessage.subscription,
        parsedMessage.payload,
        {
          TTL: 300,
          urgency: 'high',
        }
      )
  }
})
Now we can call from anywhere in our backend to send an immediate push notification to the user’s device:
$this->redisClient->publish(
    'push-notification',
    json_encode([
        'subscription' => $subscription,
        'payload' => json_encode([
            'title' => 'Hey! You have a new order!',
            'body' => 'Be at the payphone in 7 minutes',
        ]),
    ])
);
And finally, our service worker shows the push notification to the user, even if the app has been closed for days and the screen is locked:
self.addEventListener('push', function (event) {
  try {
    const parsedPayload = JSON.parse(
      event.data.text()
    )

    event.waitUntil(
      self.registration.showNotification(
        parsedPayload.title || 'Notification',
        {
          body: parsedPayload.body || 'No body',
          data: {
            url: parsedPayload.url || '/',
          },
        },
      ),
    )
  } catch (e) {
    console.error(
      'Invalid push payload:', event.data.text()
    )
  }
})
Final word
This article likely only scratches the surface of the entire endeavour, however, I hope that some interesting information was shared. Do not hesitate to contact me if you have any questions or comments.